Gnome shell: my first extension
Lately I’ve been playing with gnome-shell, I wanted to create an extension and finally came up with a result. The experience was actually a bit painful due to a lack of documentation. In this post I will present the simple extension I’ve got and provide explanations whenever I can. However, this should be taken with carefulness since I’ve started with few days ago. Nevertheless the extension is pretty simple and I think it can help someone, starting by me.
How it looks like:
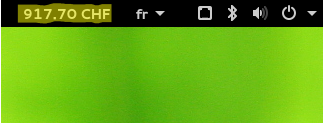 It simply displays in the top panel an indicator retrieved from a web site. For information, the web site I used
is Transfer Wise but I encourage you to change for data that interests you.
It simply displays in the top panel an indicator retrieved from a web site. For information, the web site I used
is Transfer Wise but I encourage you to change for data that interests you.
- I am currently using version 3.16.4 of Gnome Shell.
- This post is not a tutorial to start with gnome-shell, it would have been a really tough work. There is actually not so much documentation online. I will just recommend you this link: http://mathematicalcoffee.blogspot.fr.
1. Before starting
There are few apps and commands you should know before starting.
- Tweaks tool
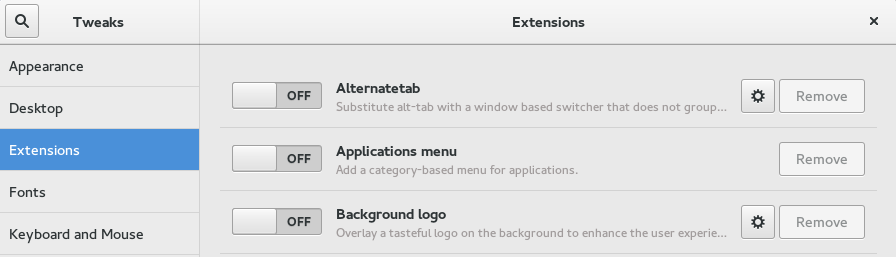 It allows to see gnome-shell extensions installed and enable/disable/remove them. It actually does much
more but here we won’t need the other features.
It allows to see gnome-shell extensions installed and enable/disable/remove them. It actually does much
more but here we won’t need the other features.
# On fedora
$ dnf install gnome-tweak-tool
- Logs
You can find the details on this page https://wiki.gnome.org/Apps/Logs. This app is used to watch many different kind of logs. We will use it to display the logs of our extension.
- Commands and shortcuts
- Open the “gnome-shell popup” (not sure how it’s called): ALT + F2
- Close the “gnome-shell popup”: ESC or Enter
- Restart gnome-shell: open the popup + write “r” + press enter. (the screen should blink)
- Open looking glass: open the popup + write “lg” + press enter. (Looking glass is a kind of console + debugger + inspector for Gnome Shell)
- Quit looking glass: ESC
- Gnome-shell crashed:
$ ps -e | gnome-shell
# ps aux | gnome-shell (when multiple results)
# and then kill the process.
2. Create a new project
Creating a new extension is easily done by writing this command in a terminal:
$ gnome-shell-extension-tool --create-extensionIt will prompt for a name, a description and a uui. You will be able to modify these metadata later if you like to. For my extension I entered:
- name: Transfer Wise Indicator
- description: Get CHF transfer rate
- uui: transferwise@smasue.github.com
Once the information submitted an editor will pop up showing the default code for an extension:
const St = imports.gi.St;
const Main = imports.ui.main;
const Tweener = imports.ui.tweener;

let text, button;

function _hideHello() {
    Main.uiGroup.remove_actor(text);
    text = null;
}

function _showHello() {
    if (!text) {
        text = new St.Label({ style_class: 'helloworld-label', text: "Hello, world!" });
        Main.uiGroup.add_actor(text);
    }

    text.opacity = 255;

    let monitor = Main.layoutManager.primaryMonitor;

    text.set_position(monitor.x + Math.floor(monitor.width / 2 - text.width / 2),
                      monitor.y + Math.floor(monitor.height / 2 - text.height / 2));

    Tweener.addTween(text,
                     { opacity: 0,
                       time: 2,
                       transition: 'easeOutQuad',
                       onComplete: _hideHello });
}

function init() {
    button = new St.Bin({ style_class: 'panel-button',
                          reactive: true,
                          can_focus: true,
                          x_fill: true,
                          y_fill: false,
                          track_hover: true });
    let icon = new St.Icon({ icon_name: 'system-run-symbolic',
                             style_class: 'system-status-icon' });

    button.set_child(icon);
    button.connect('button-press-event', _showHello);
}

function enable() {
    Main.panel._rightBox.insert_child_at_index(button, 0);
}

function disable() {
    Main.panel._rightBox.remove_child(button);
}
There is a complete description of this code in the official documentation here.
If you prefer you can re-open the code in you favorite editor. The extensions are located in this folder:
.local/share/gnome-shell/extensions/You should see a folder named after the uuid you gave (If there are other folders it means you already installed gnome extensions). Inside there are three files:
- extension.js (the javascript code for your extension)
- metadata.js (metadata: name, description, uuid, gnome-version, …)
- stylesheet.css (CSS to specify some style on your UI components)
To install the extension you need to open the Tweaks Tool. You should see it in the list, switch it on. The extension is a button with an icon in the top panel. When you click on it a popup appears with “Hello World”.
3. Start writing our own extension
Now we have a new project we can start modifying it. For instance if you change the label.
text = new St.Label({ style_class: 'helloworld-label', text: "My first extension!" });Then restart gnome-shell to make the change effective. ALFT+ F2, write "r" and press enter. Normally if you click
again on the button you should see the change.
a. Clean up
We will actually reuse the hello world extension because it has similarities with what we want to achieve. Indeed, it touches the same area of gnome-shell which is the top menu. Of course, instead of an icon we would like a text taken from a web service. Also, we don’t really want any popup. So let’s do some clean up.
const St = imports.gi.St;
const Main = imports.ui.main;

let text, button;
function init() {
	button = new St.Bin({
		style_class: 'panel-button',
		reactive: true,
		can_focus: true,
		x_fill: true,
		y_fill: false,
		track_hover: true
	});

	text = new St.Label({text: "Text"});
	button.set_child(text);
}

function enable() {
	Main.panel._rightBox.insert_child_at_index(button, 0);
}

function disable() {
	Main.panel._rightBox.remove_child(button);
}
I removed the functions showHello and hideHello and change the button to display a text instead of the icon. Try it by refreshing gnome-shell. It looks already promising!
b. Let’s go further
It is not that simple to continue without knowledge and clear documentation. So what I done is I went on the Gnome extension web site https://extensions.gnome.org and searched for an extension close to mine and took a look at the code. Remember extensions are installed in this folder: “.local/share/gnome-shell/extensions/”. I used this one Forex indicator which is actually much more complex compare to what I wanted to build. Since it is open source I took the opportunity to get inspiration.
By the way, I would like to thank Trifonovkv the creator of this application.
c. Logger
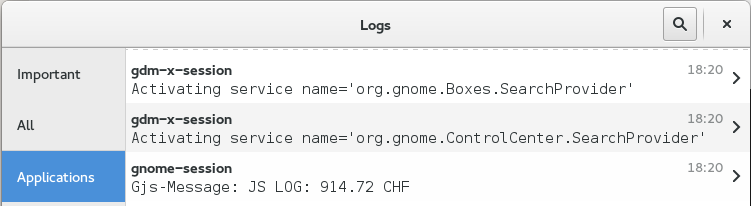
Before writing too much code I would like to introduce you how to log things. An easy way is to use global.log:
global.log("914.72 CHF");You can see the logs by opening the “Logs” application.
3. Step by step
a. Extends PanelMenu.Button
We will change a bit direction to use a PanelMenu.Button instead of a St.Bin. But the most important is, we will extends this class in order
to add custom features. Let’s start slowly:
const St = imports.gi.St;
const Main = imports.ui.main;
const Lang = imports.lang;
const PanelMenu = imports.ui.panelMenu;

const TransferWiseIndicator = new Lang.Class({
 Name: 'TransferWiseIndicator', Extends: PanelMenu.Button,

 _init: function ()
 {
   this.parent(0.0, "Transfer Wise Indicator", false);
   let text = new St.Label({text: "Text"});
   this.actor.add_actor(text);
 }
});

let twMenu;

function init()
{
}

function enable()
{
  twMenu = new TransferWiseIndicator;
  Main.panel.addToStatusArea('tw-indicator', twMenu);
}

function disable()
{
  twMenu.destroy();
}
This does exactly the same as before in terms of result but behind the scene we created our own class TransferWiseIndicator.
b. HTTP request
Now it’s time to get real data in order to display something else. Let’s see how to do an HTTP call:
  //the library to work with http request
  const Soup = imports.gi.Soup;

  // request parameters
  let params = {
   amount: '1000',
   sourceCurrency: 'CHF',
   targetCurrency: 'EUR'
  };

  // new sesssion
  let _httpSession = new Soup.Session();

  // create http request:
  // method (GET, POST, ...)
  // URL
  // request parameters
  let message = Soup.form_request_new_from_hash('GET', URL, params);

  // add headers needed for Transfer Wise
  message.request_headers.append("X-Authorization-key", TW_AUTH_KEY);

  // execute the request and define the callback
  _httpSession.queue_message(message, Lang.bind(this,
   function (_httpSession, message) {
     if (message.status_code !== 200)
       return;
     let json = JSON.parse(message.response_body.data);
     // do something with the data
   })
  );
The library used is Soup. We are missing the value for URL and TW_AUTH_KEY but I think you got the idea.
c. Loop
Now we know how to display a text in the top menu and to get data with an HTTP request. In theory if we merge that we are almost done. However, it’s not that awesome if the text doesn’t refresh. To do so, we will use another import:
const Mainloop = imports.mainloop;Create a loop:
_refresh: function () {
  if (this._timeout) {
    Mainloop.source_remove(this._timeout);
    this._timeout = null;
  }
  // the refresh function will be called every 10 sec.
  this._timeout = Mainloop.timeout_add_seconds(10, Lang.bind(this, this._refresh));
}
The refresh function will be part of our class and call every 10 sec.
d. Put things together
const St = imports.gi.St;
const Main = imports.ui.main;
const Soup = imports.gi.Soup;
const Lang = imports.lang;
const Mainloop = imports.mainloop;
const Clutter = imports.gi.Clutter;
const PanelMenu = imports.ui.panelMenu;

const TW_URL = 'https://transferwise.com/api/v1/payment/calculate';
const TW_AUTH_KEY = 'dad99d7d8e52c2c8aaf9fda788d8acdc';


let _httpSession;
const TransferWiseIndicator = new Lang.Class({
  Name: 'TransferWiseIndicator',
  Extends: PanelMenu.Button,

  _init: function () {
    this.parent(0.0, "Transfer Wise Indicator", false);
    this.buttonText = new St.Label({
      text: _("Loading..."),
      y_align: Clutter.ActorAlign.CENTER
    });
    this.actor.add_actor(this.buttonText);
    this._refresh();
  },

  _refresh: function () {
    this._loadData(this._refreshUI);
    this._removeTimeout();
    this._timeout = Mainloop.timeout_add_seconds(10, Lang.bind(this, this._refresh));
    return true;
  },

  _loadData: function () {
    let params = {
      amount: '1000',
      sourceCurrency: 'CHF',
      targetCurrency: 'EUR'
    };
    _httpSession = new Soup.Session();
    let message = Soup.form_request_new_from_hash('GET', TW_URL, params);
    message.request_headers.append("X-Authorization-key", TW_AUTH_KEY);
    _httpSession.queue_message(message, Lang.bind(this, function (_httpSession, message) {
          if (message.status_code !== 200)
            return;
          let json = JSON.parse(message.response_body.data);
          this._refreshUI(json);
        }
      )
    );
  },

  _refreshUI: function (data) {
    let txt = data.transferwisePayOut.toString();
    txt = txt.substring(0,6) + ' CHF';
    global.log(txt);
    this.buttonText.set_text(txt);
  },

  _removeTimeout: function () {
    if (this._timeout) {
      Mainloop.source_remove(this._timeout);
      this._timeout = null;
    }
  },

  stop: function () {
    if (_httpSession !== undefined)
      _httpSession.abort();
    _httpSession = undefined;

    if (this._timeout)
      Mainloop.source_remove(this._timeout);
    this._timeout = undefined;

    this.menu.removeAll();
  }
});

let twMenu;

function init() {
}

function enable() {
	twMenu = new TransferWiseIndicator;
	Main.panel.addToStatusArea('tw-indicator', twMenu);
}

function disable() {
	twMenu.stop();
	twMenu.destroy();
}
Here the full project on Github.